Send & Receive BTC
Before you start, confirm the network shown on the home screen and that your node is ready. Both parties must use the same network. Testnet coins have no real value.
On Regtest, if the balance is zero, claim 0.1 BTC of test coins with the Regtest Faucet first, then practice send and receive.
Receive BTC (On-chain)
On Home, tap Receive
Choose BTC Onchain Address
Copy the address or show the QR code to the payer
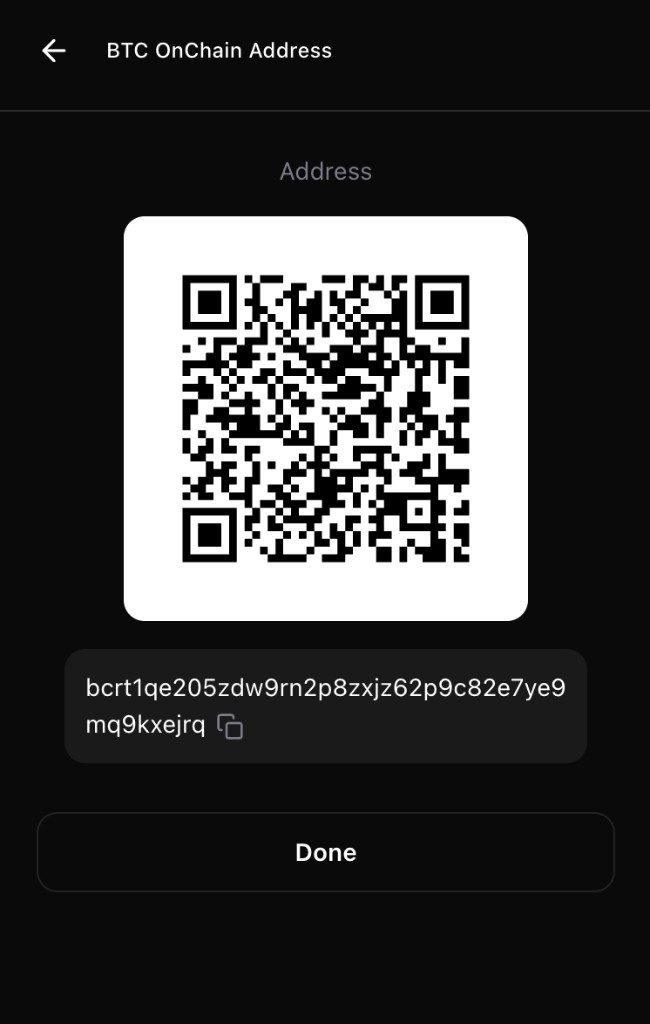
After the transaction confirms on-chain, refresh or return Home to check the balance
A broadcast or a claim that funds were sent does not mean the balance is safe to spend yet. Confirmation time depends on congestion, fees, and block production. If nothing updates for a long time, check the TXID, node status, and refresh.
Send BTC (On-chain)
On Home, tap Send
Paste the recipient Bitcoin address
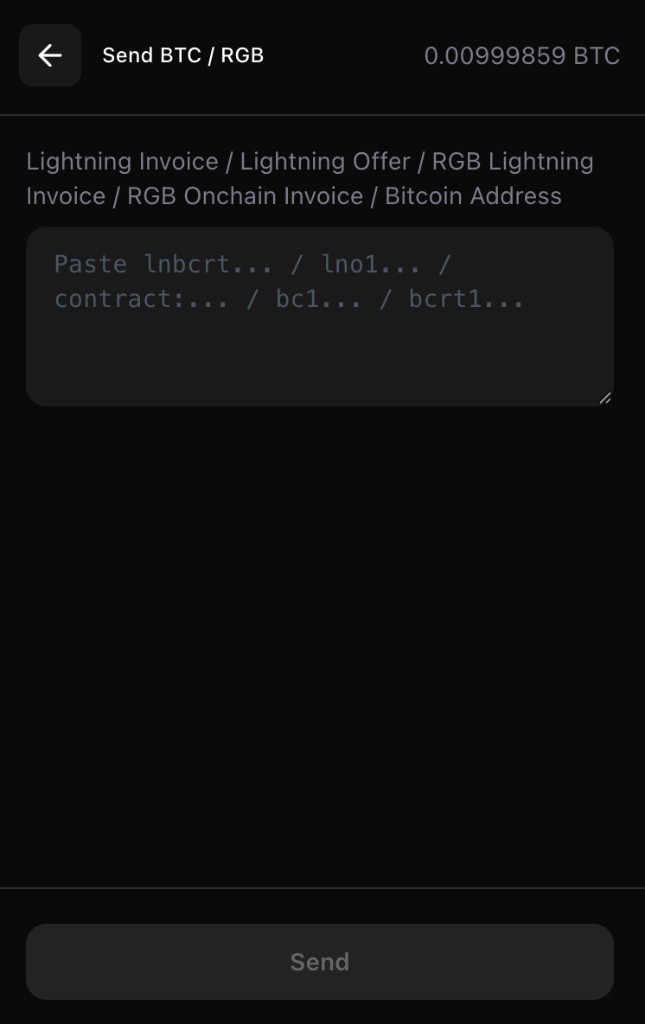
Enter the amount in sats; the page shows an approximate BTC value
Max sends the currently available amount (reserves may apply; the recipient amount is after miner fees)Choose or enter a fee rate in sat/vB (fee per virtual byte—not the total miner fee for the whole transaction)
On the confirm screen, verify address, amount, and fee rate, then submit
After success, watch confirmation status; you can verify the TXID in a block explorer
About fees
- On-chain transfers require miner fees; a rate that is too low can delay confirmation
- Trust the fee shown on the final confirm screen; use a custom rate when needed
- Make sure spendable balance covers the amount plus the miner fee
Activity History
On Home, open Activities and filter by on-chain or Lightning for recent payment-related records.
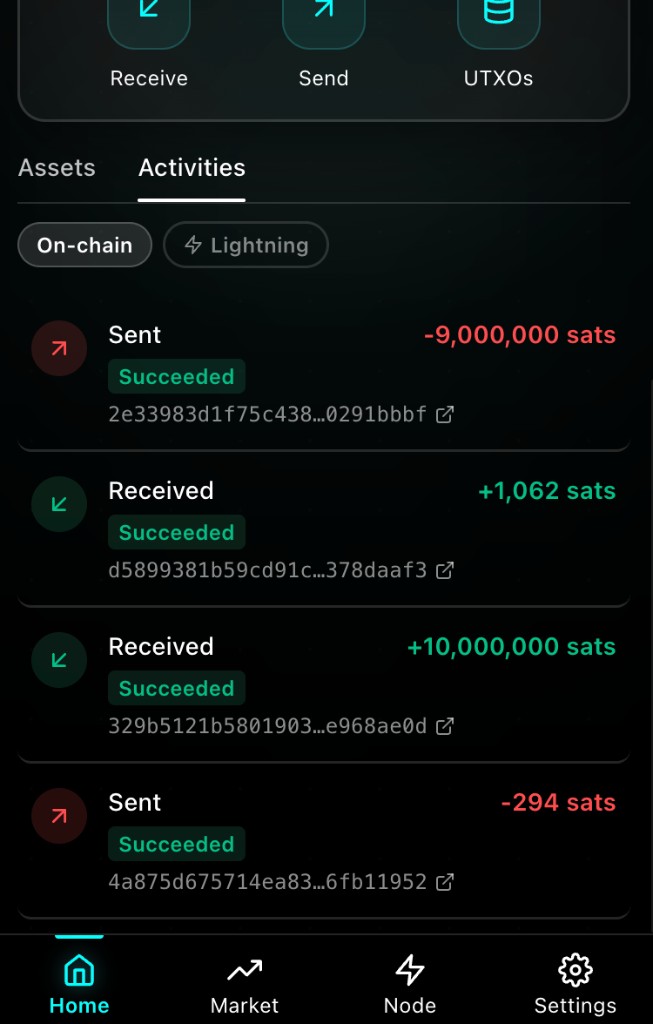
These records are for day-to-day checks. Coverage depends on what the node currently provides and may not include a full address history. For rigorous verification, use the TXID and a block explorer.
Manage UTXOs
UTXOs on Home lets you inspect and manage unspent Bitcoin outputs. It is also a common preparation step before RGB use.
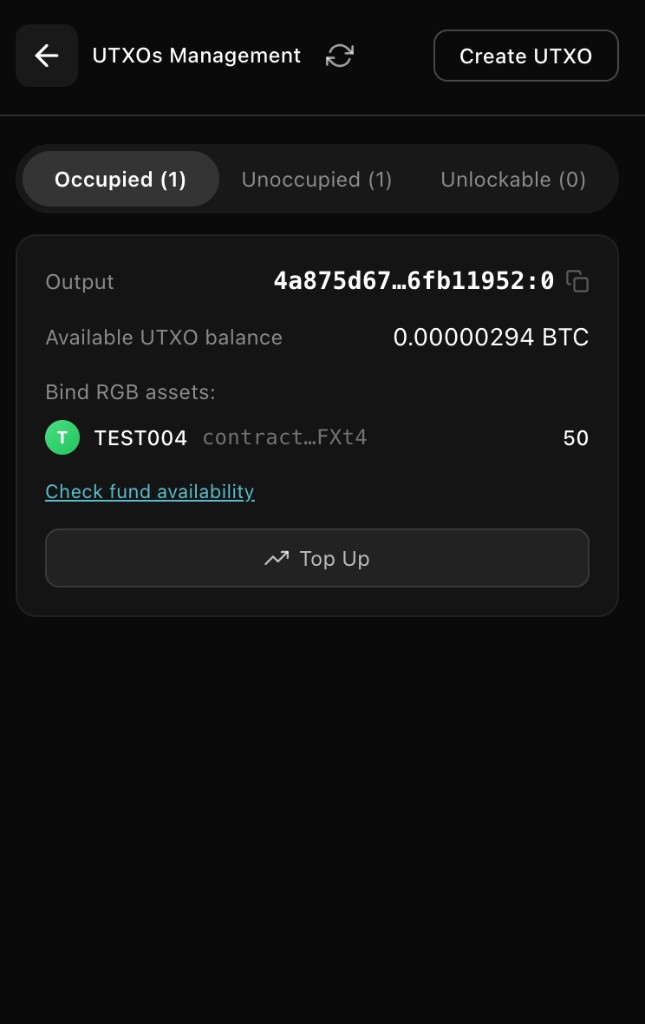
When to create an RGB carrier
Receiving on-chain RGB assets or issuing a token usually needs an available RGB carrier (a UTXO prepared for RGB). If the UI says none is available:
- Open UTXOs
- Create an RGB carrier as prompted, confirm amount and fee, then submit
- Wait for that on-chain transaction to confirm, refresh, then continue
Expand and sweep
Expand: If the BTC on an asset’s carrier is too low for later network fees, raise the carrier’s BTC capacity as prompted. You enter the target capacity after expansion; wait for confirmation and avoid repeating the action too soon.
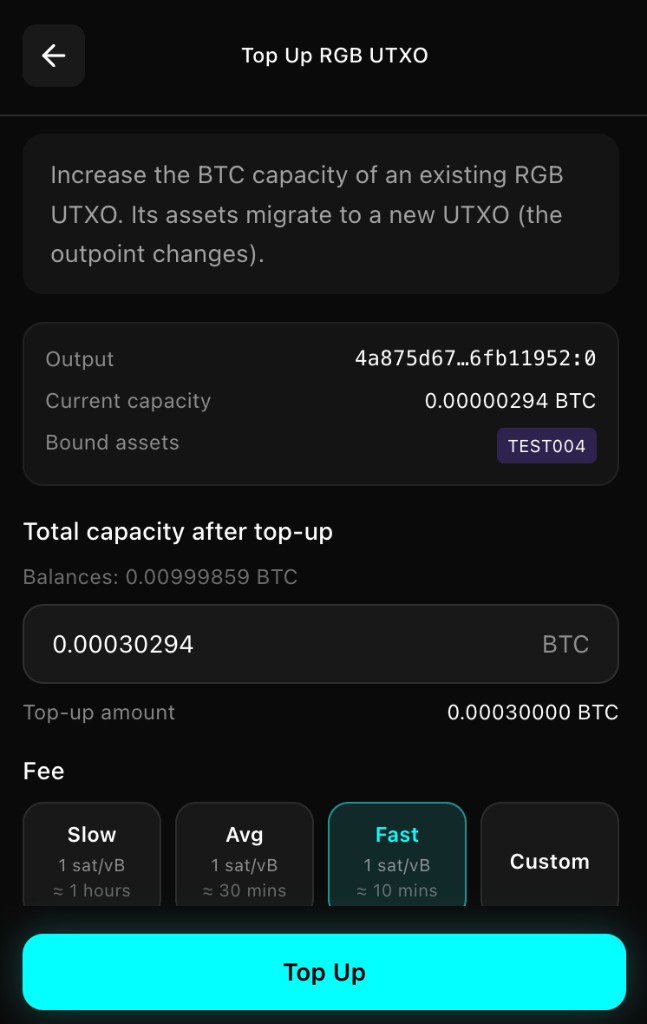
Sweep: Usually only empty carriers can be swept back to normal balance; outputs that hold RGB assets cannot be swept directly.
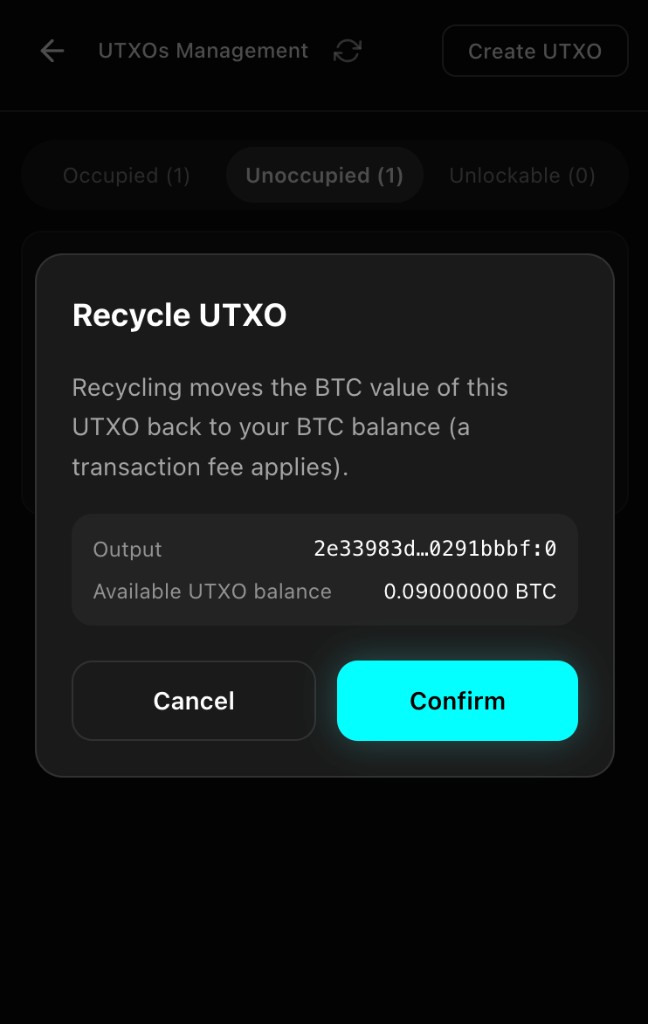
Release: Clears a reservation in the UI; it does not automatically move assets back.
Check UTXO details for status and why an action is blocked. Read prompts carefully before confirming.
Notes
- Bitcoin transfers are usually irreversible—verify address and network before sending
- For large amounts, send a small test first
- Total wallet BTC, ordinary spendable balance, and BTC on RGB carriers are not the same; for RGB fee errors, also check the UTXOs page
- If the result is unclear (timeout or unknown status), check TXID, balance, and Activities first—do not resend immediately
Next Steps
Continue with RGB Assets.